No products in the cart.

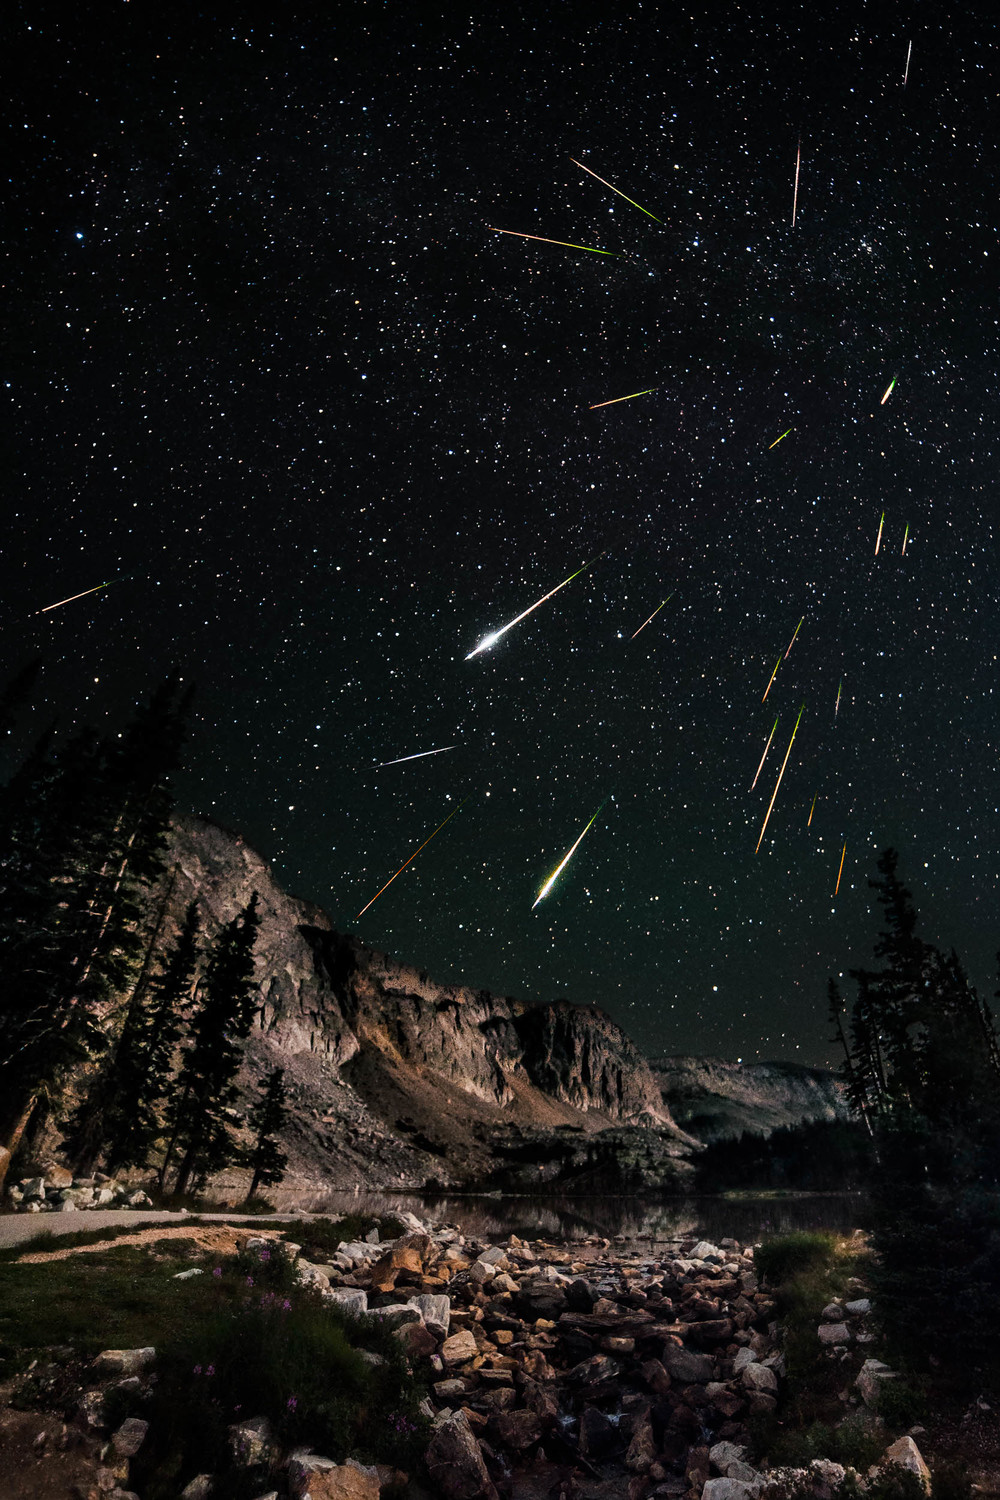
The 2013 Perseids meteor shower is approaching fast, I want to share with you my methods to capture an image like this from the 2012 Perseids
The 2013 Perseids will peak on the night of August 11th into the morning of August 12th but is very active on the night before or after as well. The moon will be illuminated at 25% which will only slightly interfere early in the evening, but the moon sets around 10:20pm. The peak of the shower is after midnight so there will be a perfectly dark sky for the main show.
The radiant of the Perseids (where the meteors originate from) travels through the Northeast sky as you can see in the video below. This does not mean you should point your camera directly Northeast though. My recommendation is to face directly North if you’re shooting in portrait orientation (recommended) this way the radiant lands on the right edge of the frame. Why do you want this? The meteors come from the radiant, but the meteors appear away from the radiant, so you need some breathing room to capture as many meteors as possible. You could face East to capture the meteors coming from the other side of the radiant, but the way the radiant moves through the sky doesn’t lend itself to travel through the frame well.
This video shows a representation of how the radiant will travel through the sky through the entire night, the yellow line represents what will be captured with a 14mm lens on a full frame camera in portrait orientation. You can see in this configuration the radiant stays in the frame for the entire night. Created in Starry Night
Find a Dark Sky:
Head over to Dark Sky Finder and find a location near you that falls in at least the green areas, but blue or black is preferred. There also should not be a large city to the North or NE of your location, not a total necessity but is preferred so the light pollution on the horizon doesn’t wash out the lower meteors.
Essential Gear:
Solid Tripod
Intervalometer – Must be wired to ensure connection, I recommend theShutterBoss as a low cost alternative to Nikon or Canon
Memory card large enough to hold 1000 images, or be prepared to swap out cards in the middle of the night
Fast Ultra wide angle lens (14mm on full frame) to capture as many meteors as possible, a fisheye would work well too.
Current camera body capable of high ISO
Battery:
If you choose to shoot for the entire night (I will) you’re going to need a lot of battery power to take continuous shots for 8 hours. The best solution I’ve come up with is an external battery. If you don’t have the time to make one of these you will need to have a few batteries to spare, and change them throughout the night. A battery grip can be helpful in this situation because you can swap out the battery in the grip while the camera continues to work with the battery in the camera, plus you’re less likely to move the camera. How much battery you need varies widely depending on your camera. My D700 only goes 2 hours on a battery, but I’ve seen a D800 go for 6 hours on 2 batteries with power to spare. Best bet is to swap it out every 2-3 hours and warm up the partially used battery, you can swap this one in later in the morning when you’re running low.
Settings:
Manual mode (Bulb mode on Canon)
ISO – 6400
Aperture – f/2.8
Shutter – 30 seconds but this will be controlled by the intervalometer, set your camera to Bulb mode
White Balance – Custom of 3800k (fluorescent is fairly close)
Turn off long exposure noise reduction
Turn off mirror lock-up
Focus:
Set to manual focus
Easy method – Set lens to Infinity
Better method – Use live view or hyperfocal
Intervalometer:
Set camera to ‘Bulb’ mode
Setup your intervalometer to take continuous 30 second exposures:
Delay: 0
Long: 30″
Interval: 1″
No.: — (infinite)
Press Start when you’re ready, do not press the shutter release button
Recommendations:
- Meteors can be captured for the entire night, starting during Astronomical Twilight which begins around 9:00pm and ends at 5:00am
- If you’re lacking the motivation to stay out all night, or if you don’t have enough battery power or memory cards I would recommend going out during the peak of the shower
- The best way to view a meteor shower yourself is looking straight above (zenith) and scanning the sky, meteors will appear all over the sky
- Bring a sleeping bag, pillow and sleeping pad so you can lay down and enjoy the show without get cold or uncomfortable
- Consider shooting in Jpeg large rather than raw if you don’t have enough memory cards
- Tape down your focus ring once you find focus so you don’t change it during the night
Fun Facts:
The Perseids produce the most fireballs of any meteor shower according toNASA
Produces an average of 60-80 meteors per hour
Post Processing:
After you have captured a night of meteors you will want to merge them into a composite, which I explain the video below
This method is best explained in the video above, but if you can’t view on YouTube for some reason, here is the written description.
To start with I had to identify each image that had a meteor from the hundreds taken over the entire night. I did this in Lightroom using the color flags to identify each shot with a meteor.
Once I had them all identified I selected all 23 shots, right clicked, Edit in > Layers in Photoshop. Once opened in Photoshop I changed the blend mode of the layers to lighten to easily identify where Polaris/North Star was located. This is the point we need to rotate around to correct the meteors to their radiant.
I mark this point using the custom shape tool and placing a target symbol. Then I turn off all but the base layer and 1 additional layer. With the correct layer selected I activate the Free Transform tool, I then change the rotation point to the previously placed target.
Now I rotate the layer until the stars align and finish the transform. Then I apply a reverse layer mask by Alt+Clicking on the new layer mask button.
Then I zoom into the meteor, brush on the layer mask using white as my foreground color to show the portion of the layer with the meteor. Clean up any additional stars by switching your foreground color to black and painting them out on the layer mask. Repeat for each layer, delete the target when finished and flatten the image.
